ClevGuard Support: Monitor Devices with Others' Permission.
Most people wonder how to change region on Instagram. In this article, you will get a complete guide about generating a custom location for your business or brand and using it to drive customer traffic. It is one of the best approaches to exposing your brand and business. Read the article below for a detailed understanding.
How to Change Region on Instagram
Possible Reasons Why You Change Instagram Region
The location you share on Instagram is one of the most important data you give to this social media platform. Certain features of Instagram depend on your location, for example, "Instagram Music." When a user tries to add some music from an unsupported region, the following message will display on the screen "Instagram music is not available in your region."
If you are a social media marketer or a business owner, it is important to customize your Instagram location tag to get maximum user traffic. To reach the maximum number of people, targeting specific locations for your Instagram posts is important. Changing location and region on Instagram helps you promote your business to a higher audience. However, changing this social media app's location is quite tricky and requires proper knowledge and understanding. This article focuses on the three simplest and smartest ways of changing the location on Instagram. Have a look at the points below.
3 Ways to Change Location on Instagram
In this section, you will learn about three ways for how to change location on Instagram.
1. Use ClevGo location changer [Fake location to anywhere]
How to change region in Instagram? Well, ClevGuard ClevGo is one of the best tools for changing Instagram location. With the use of this tool, one can easily fake their GPS location on phone to anywhere. It works perfectly on all kinds of location-based applications that are available in the market today. Simulating the GPS movement is extremely simple and easy. The tool allows users to customize their routes according to their choice. Moreover, one can also set the speed of GPS movement to trick others.
The best thing about using ClevGo is that it does not require any rooting or jailbreaking on your device. ClevGo is available for both Android and iOS users. To change Instagram location settings and install it on your device, you must perform the below-listed steps one by one.
1. Download and Install ClevGo
The first step is downloading and installing the ClevGo tool on your computer. For this, visit the ClevGo official website, and download the software for your device. Once the installation process is complete, click on "Get Started."
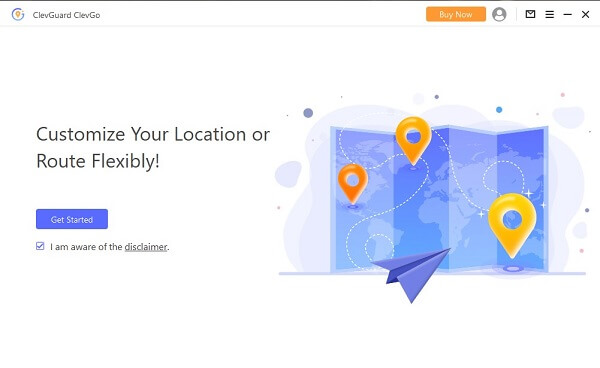
2. Connect your Device
After this, connect your phone to your computer system using a USB cable. Unlock your phone and click on the "Trust" option to complete the process.
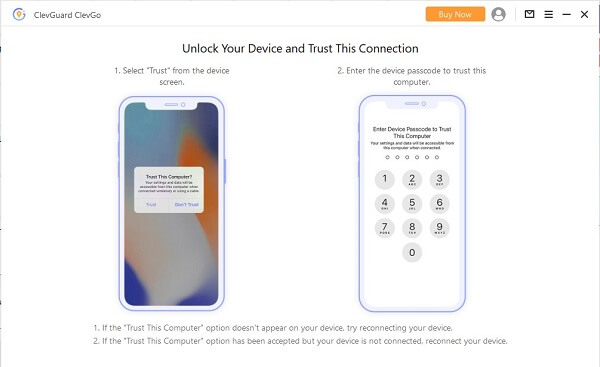
3. Load the Map
Once you connect your device successfully, you will see a map on your screen. It will direct you to find your current location on the map.
4. Changing of Location Using Teleport Mode
If you want to change your current location using "Teleport mode, select this option once the map is loaded. For this, navigate toward the upper right corner of the dashboard and select the option. After this, enter the fake address or coordinates to search for the location of your choice.
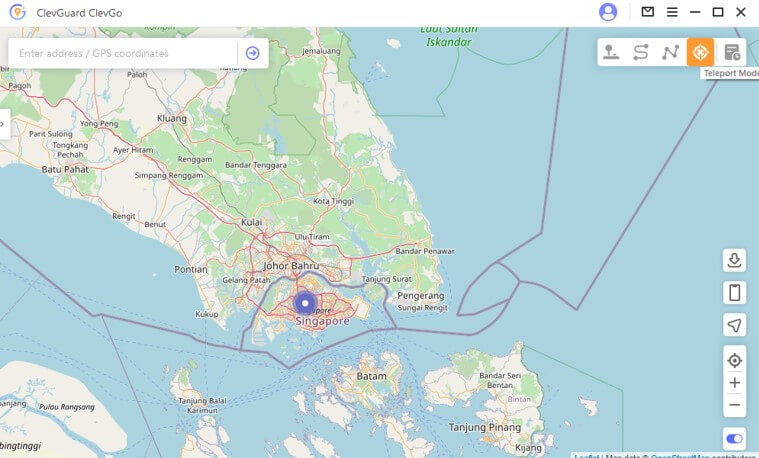
Once you pick the fake location of your choice, you will see a pop-up sidebar on your screen containing all the basic information about the location, such as the coordinates, exact address, distance, and more. One can easily change Instagram location by clicking on the move option.
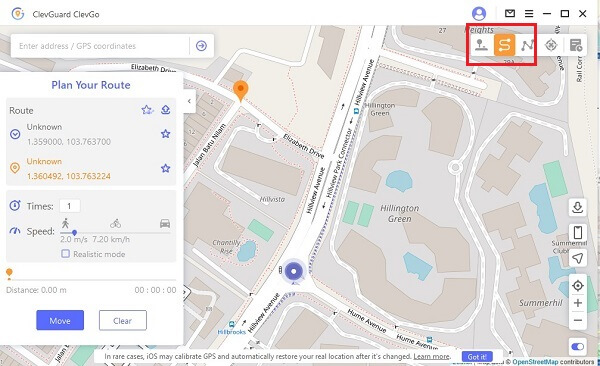
Similarly, if you want to fake your current location using a two-spot mode, select this option from the dashboard. After this, pick the starting and ending location of your choice. One can enter the address or coordinates in the search box. One can also pin their desired location to perform this job on the map.
Click on "Move." Once you reach the final point of the map, you will see a completed notification on your device.
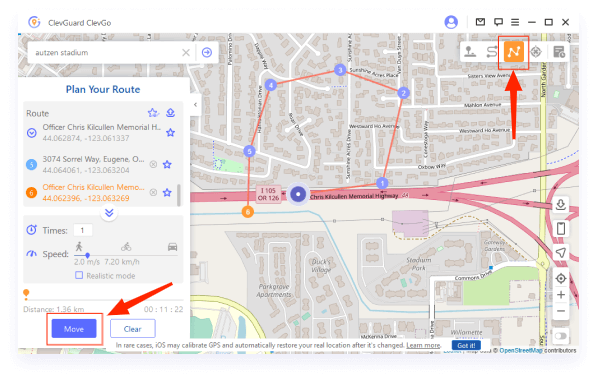
Using this mode, one can easily pick different spots (up to 100) on the map. Enter the address or coordinates in the search box. While doing this, remember to enter the locations along specific roads to make things more real. Use move to manage your movement on the map. One can easily stop or pause their movement whenever one wants.
Once you reach a final destination, a completed notification will appear on your screen.
2. Create a Custom Location with Your Facebook Account
One can also fake their current location on Instagram by creating a custom location with their Facebook account. But the question here is how to create and change location on Instagram? Well, check the below-listed steps for a detailed guide.
Step 1: Create a Post on Facebook
The first step is to open your Facebook app and create a post. While creating a post, click on the check-in to enter the location.

Step 2: Enter the Location
Now select the location of your choice. You can allow your Facebook app to pick your current location or select one of your choices from the map. If you want to pick the location, open the search bar and type the name of your desired custom location. After this, click on the + symbol. By doing this, you can easily create your location without any difficulty.
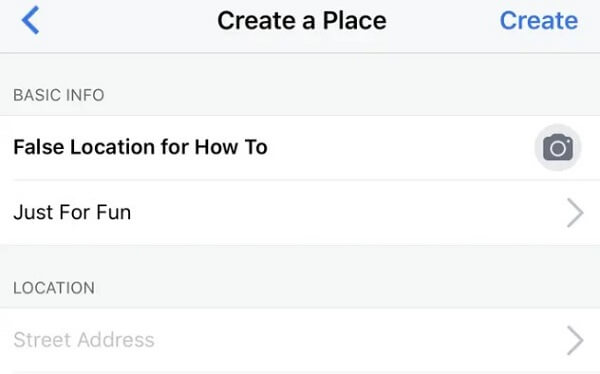
Step 3: Save the Location
Once you create the desired location, click on save. Now your new location will appear on both your Facebook and Instagram accounts.
Keep this noted that sometimes this approach needs to be revised. In such a case, when a user enters some location in the search box, it will not appear in an Instagram Location Search. In this case, there are some solutions to try: try checking in again; choose a real, accurate category; refresh the page or give some time to it.
3. Mock virtual location with VPN
Knowing methods for how to change location on Instagram can help enhance your account's security. VPN location changer is one of the safe and reliable method of changing your location on Instagram.
The entire process is very secure and simple. To change your location using a VPN, follow the below-listed guide.
- Install a safe VPN on your device
- Select the remote server
- Open your Instagram account and create a new post.
- Click on your current location and update it.
By performing the above-mentioned steps, one can instantly obtain an IP address from some other location without any difficulty.
FAQs About Change location on Instagram
To add a location to your Instagram story, swipe left to post some story and tap on the emoji icon. After this, search for the location option and enter the location of your choice.
To add location on the existing post on Instagram, click on the three dot option above your photo or video. After this, tap on edit and click on add location. Now enter the location and tap on the tick option.
For this, hold your finger down on the colour circles of your choice. After this, a big colour grid will appear on your screen. Now draw your finger crossways the screen and pick the color of your choice. After this, release your finger to apply the color on the desired area.
To hide your location on Instagram, navigate towards your phone’s settings. Pick the option App management and click on app list. Now select Instagram from the list and move towards permissions. If you see the location option in the list of allowed permission, tap on it. To hide the location, select the deny checkbox and save the changes.
Conclusion
Instagram is one of the best social media platforms. People share their pictures, ideas, views, business related information and products with people using this amazing App. One can easily change the location on Instagram without any difficulty. There are different ways of performing this job but the most reliable one is through ClevGo. Read the article above for a detailed guide on this.


